

News

Miro: A New Standard in Responsible Innovation

Miro: A New Standard in Responsible Innovation The Miro monitor arm is setting new benchmarks in sustainability. It offers a high-performance solution without compromising on environmental responsibility. Designed with careful material selection, local sourcing, and longevity in mind, Miro’s responsible approach to design and unique manoeuvrability set it apart from the competition. Sustainable Choices Miro is crafted from energy-efficient materials with a lower carbon impact....

Read more
HSE Advisor

Role Purpose Support in the development, implementation and maintenance of the company’s Health, Safety & Environmental policies, processes, operational procedures, and standards.  Ensuring best practice and championing a continually improving HSE culture within the business. Key Responsibilities Liaise with and provide support to all areas of the business to eliminate, mitigate or reduce identified HSE exposures. Partner with the production management team and team leaders,...

Read more
CMD Ltd LAUNCHES 48-HOUR TURNAROUND ON BETATRAK® RAPID ORDERING SERVICE

CMD Ltd, the specialist in power distribution systems, workstation power and monitor arms, has launched a rapid ordering service for its Betatrak® underfloor powertrack distribution systems and accessories, with a commitment to delivering within 48-hours of an approved purchase order*. The service enables customers to order up to 50 lengths of Standard or Clean Earth (C/E) low noise Betatrak, along with up to 25 feed...

Read more

CMD INVESTS £1/4 MILLION IN NEW MACHINE AS PART OF FACTORY UPGRADE

We have invested in a new £1/4m TRUMPF CNC metal punch as part of an asset renewal strategy for our UK manufacturing capability. The new machine will be used in the production of a wide variety of our power distribution systems and workstation power products at our Rotherham factory. Suitable for handling sheet metal between 0.9mm and 3.0mm thick, the new machine will replace one...

Read more

CMD CATALOGUE PROVIDES TECHNICAL POWER DISTRIBUTION GUIDE

CMD Ltd has released a new catalogue, providing an easy to follow technical guide to our power distribution systems and plug and play desk modules. Detailing CMD’s full range of UK-manufactured power distribution systems and plug and play desk modules, the catalogue will be a helpful source of information to M&E engineers and contractors alike to understand how our power distribution systems connect together and...

Read more

Power Distribution Catalogue
CMD Ltd PLAYS ESSENTIAL ROLE IN ELECTRICAL FIT OUT AT LONDON’S PRESTIGIOUS OFFICE DEVELOPMENT

CMD Ltd, specialist in workplace connectivity and ergonomic solutions, has provided a flexible and high-quality power distribution network for The Ray, a prestigious office development in London’s Farringdon. Well-known for being the former site of The Guardian newspaper, The Ray now stands as an 83,000ft² office development characterised by a modernised warehouse aesthetic, with level two now occupied by a global social media company. The...

Read more

The Ray
CMD plugs in to european opportunity with Schuko Capsule unit launch

CMD Ltd, the specialist in power and connectivity solutions for commercial environments, has launched a Schuko version of its popular fixed format Capsule workstation power module for export to mainland Europe and beyond. A popular on desk power module comprising two sockets and dual USB (type A and C) chargers, CMD’s Capsule unit is already widely specified in the UK as an off-the-shelf workstation power...

Read more

CMD White Schuko Capsule Desk Power Module
CMD LTD EXTENDS MONITOR ARM RANGE WITH THE LAUNCH OF REACH PLUS

CMD Ltd, the specialist in ergonomic and connectivity solutions for commercial interiors, has completed its Reach monitor arm range with the launch of the Reach Plus. Available in single or dual screen options, the Reach Plus has been designed to provide an ideal solution for both single and dual screen workstation configurations, or can be used with next generation of large format curved screens. Suitable...

Read more

CMD Ltd DEMONSTRATES THE ART OF POWER DISTRIBUTION AT THE UNIVERSITY OF WARWICK

CMD Ltd, the specialist in workplace connectivity and ergonomic solutions, has provided Betatrak busbar power distribution and a range of electrical accessories for two major capital investment projects at the University of Warwick. Designed by Fielden Clegg Bradley Studios, the £33 million Faculty of Arts building is a showpiece development comprising four interconnected structures set around a central atrium, which will enable inter-disciplinary collaboration across...

Read more

University of Warwick
CMD BRINGS HARMONY TO COVENTRY UNIVERSITY RESEARCH FACILITIES

CMD Ltd, the specialist in power distribution solutions and workstation power and ergonomics, has provided under desk and on desk power modules for the refurbishment of three Coventry University research buildings. Located on Coventry University Technology Park, a business park designed to encourage collaboration between the university and knowledge-based businesses, the three buildings are being repurposed as office accommodation for university research teams. The refurbishment...

Read more

Coventry University

10 Carburetor Cleaner Tips for Better Engine Performance

A clean carburetor can help an engine start more smoothly, respond faster, and waste less fuel. However, cleaner alone cannot repair worn jets, damaged gaskets, or ignition problems. This guide explores ten practical Carburetor Cleaner tips for improving engine performance without creating new faults.

In my workshop experience, small details often make the biggest difference. A sticky throttle plate may need only careful cleaning. A blocked passage may require patience, proper lighting, and a soft brush. Spray too aggressively, and loosened debris can move deeper into the system. Use the wrong product, and rubber seals or painted surfaces may suffer.

Safety remains part of good mechanical practice. Work outdoors or in strong ventilation, keep the engine cool, and wear chemical-resistant gloves and eye protection. Always check the product label and equipment manual before application. Different cleaners have different formulas, and “more” is rarely better. That lesson is easy to forget.

These tips will cover preparation, targeted spraying, residue removal, drying time, and post-cleaning checks. They will also explain when cleaning is reasonable and when professional diagnosis makes more sense. A carburetor may look clean from the outside while hidden passages remain restricted. Careful inspection matters. Results can vary, especially on older engines with unknown maintenance histories. Even experienced owners miss things sometimes. The goal is not a quick shine, but dependable airflow, controlled fuel delivery, and safer engine operation.

10 Carburetor Cleaner Tips for Better Engine Performance

Choose the Right Carburetor Cleaner for Your Engine

Choosing the right carburetor cleaner begins with understanding your engine’s condition. Not every cleaner suits every carburetor. Some formulas target light varnish, while stronger solvents remove thick fuel deposits. Read the product label carefully. Match its stated use with your engine manual and carburetor materials. Aluminum may tolerate a solvent that damages rubber seals or plastic floats. An aerosol can reach narrow passages easily, but overspray may affect nearby wiring or painted surfaces. I once assumed stronger meant better. That was not always true.

Tip: Inspect the deposits before choosing a cleaner. A thin brown film needs less aggressive treatment than hard, black buildup. Check whether the formula is safe for gaskets, O-rings, and coated parts. If the label is unclear, choose a gentler cleaner or ask a qualified mechanic.

Work on a completely cool engine in a well-ventilated area. Wear chemical-resistant gloves and eye protection. Remove loose dirt first, so it does not enter the jets. Apply short bursts rather than flooding the assembly. Use a soft brush and a clean, lint-free cloth. Avoid forcing wire through precision passages, because small scratches can change fuel flow. Let the parts dry fully before reassembly. My own mistake was rushing this step; residual solvent made the engine stumble briefly. Recheck the idle after starting, and inspect for leaks around every connection.

Prepare the Engine and Work Area Safely

Before using carburetor cleaner, let the engine cool completely. Hot manifolds can ignite solvent vapors. Move the vehicle outdoors or into a workshop with cross-ventilation. OSHA’s flammable-liquid guidance requires ignition-source control and adequate ventilation during solvent handling. NFPA’s 2022 Fire Loss report recorded about 1.5 million U.S. fires, so “just a quick spray” deserves respect. Disconnect the battery, remove jewelry, and keep cigarettes, heaters, and grinding tools far away. Wear chemical-resistant gloves and safety glasses. Small details matter.

Protect the work area with an absorbent mat and a sealed waste container. Read the product Safety Data Sheet before opening the can. It identifies vapor hazards, required personal protection, and suitable first-aid measures. Never spray toward your face or an operating electrical component. Place removed parts on a clean tray, not on dusty concrete. A dirty surface can return grit to the fuel system. I still recheck the battery connection before starting work; rushing this step is an easy mistake. Use only the amount needed, and allow vapors to clear before reconnecting power. The NIOSH Pocket Guide notes that common cleaning solvents can irritate the eyes, skin, and respiratory system, even when exposure feels brief. A respirator is not a substitute for ventilation. If the area smells strongly of solvent, stop and improve airflow. Safety is not dramatic. It is deliberate.

Remove and Inspect Carburetor Components

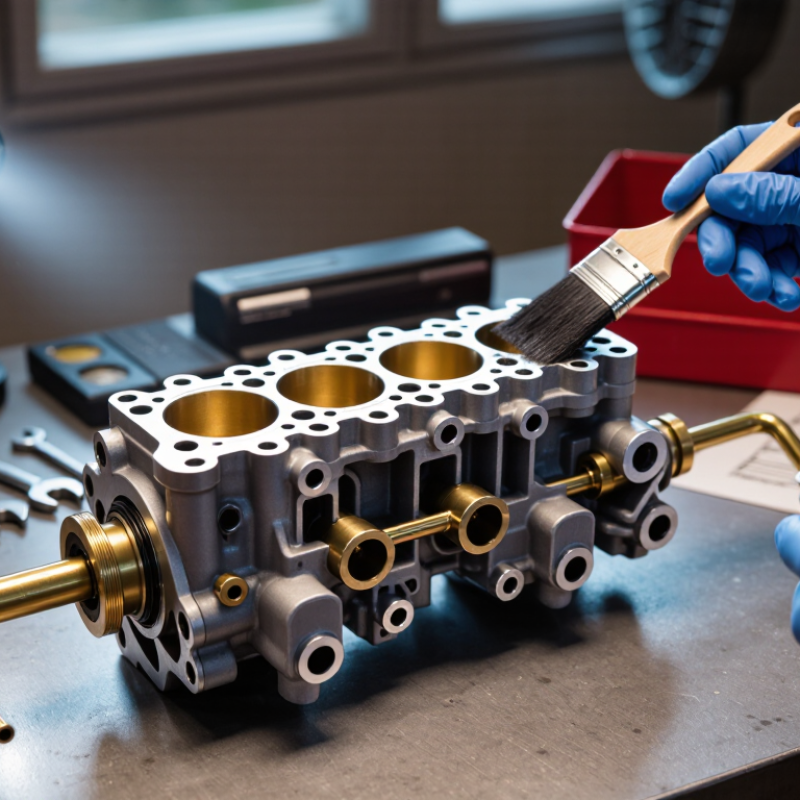
Before cleaning a carburetor, remove the air filter and disconnect the fuel supply. Work in a well-ventilated area, away from sparks and open flames. Take clear photographs of each linkage and hose. This small step prevents many reassembly mistakes.

Tips: Place removed parts in a clean tray, not on the workshop floor. Separate the float bowl, float, needle valve, jets, and gaskets carefully. Spray cleaner through metal passages, then use compressed air to remove loosened residue. Never force a hard wire through a jet. It can change the opening and disturb fuel delivery. Check every component under bright light. A damaged gasket, sticky float, or worn needle tip may cause flooding, rough idling, or difficult starting.

Inspect the throttle shaft for excessive side movement. Look for corrosion inside the bowl and varnish around the main jet. Some deposits appear harmless but can restrict fuel flow after reassembly. Replace brittle seals and distorted gaskets. Do not reuse parts simply because they look acceptable. I have learned that visual inspection alone can miss small air leaks. Cleaning improves performance only when the underlying wear is addressed.

Tips: Let metal parts dry fully before assembly. Keep cleaner away from rubber and painted surfaces. Reinstall jets gently, using the correct tool and moderate pressure. Confirm that the float moves freely and the needle valve closes properly. If the engine still runs poorly, recheck fuel flow, ignition condition, and adjustment settings instead of blaming the carburetor immediately.

Apply Ten Cleaning Tips for Better Fuel Flow

A clean carburetor can improve fuel flow, throttle response, and starting behavior. In my workshop experience, small deposits often cause uneven idling before serious problems appear. Work only on a cool engine, in fresh air, and wear gloves and eye protection.

Remove the air filter and cover the intake opening with a clean cloth. Photograph the throttle linkages before removing anything; memory can be unreliable. Drain the float bowl into a suitable container. Use a cleaner designed for carburetors, and keep it away from painted surfaces. Gently scrub deposits with a soft nylon brush. Never force a wire through a jet, because its opening can change. Blow through passages with low-pressure compressed air, while holding loose parts securely. Inspect the float, needle, and gasket for swelling, cracks, or hard edges.

Replace damaged seals rather than hoping they will recover. Let every passage dry completely before reassembly. Even a small solvent pocket can affect the first start. Reconnect the linkages using your photographs, then check that the throttle moves smoothly. Start the engine and listen for a steady idle. A brief stumble may occur, but persistent hesitation needs further diagnosis. I once overlooked a partly blocked vent and blamed the main jet, so I now inspect airflow paths twice. Clean fuel and a properly fitted filter also protect the work. Ten careful cleaning habits help fuel arrive consistently, although cleaning alone cannot repair worn components.

10 Carburetor Cleaner Tips for Better Engine Performance

Clean fuel passages help the engine maintain a more stable air–fuel mixture. The chart shows typical gasoline-engine air–fuel ratio targets under common operating conditions.

Cleaning Tips for Better Fuel Flow

  1. Work in a well-ventilated area and keep the engine switched off.
  2. Remove loose dirt before spraying cleaner into the carburetor.
  3. Use cleaner on the air passages, throttle plate, and choke components.
  4. Remove and clean the float bowl to clear sediment and varnish.
  5. Clean jets with approved solvent and compressed air.
  6. Never enlarge a jet with wire or drill bits.
  7. Check that the float and needle valve move freely.
  8. Inspect gaskets and replace damaged seals before reassembly.
  9. Verify that the air filter is clean so airflow is not restricted.
  10. Start the engine, allow it to warm up, and check idle quality and throttle response.

Typical reference ranges: richer mixtures are commonly used during acceleration and full-load operation, while cruising generally uses a mixture closer to the gasoline stoichiometric ratio of approximately 14.7:1. Actual settings vary by engine design, altitude, temperature, and tuning.

Reassemble the Carburetor and Test Engine Performance

Reassembling a carburetor requires patience, clean hands, and careful attention to small parts. Let every component dry completely after using carburetor cleaner. Solvent trapped inside a passage can affect starting and idle quality. Inspect the float, needle valve, jets, gasket, and throttle shaft for wear. Replace damaged seals instead of forcing them back into place.

Follow the original orientation of each part. A misplaced linkage can prevent the throttle from closing safely. Tighten screws evenly, but avoid excessive force. Soft metal threads can strip easily. I once installed a bowl gasket slightly out of position, and the engine developed a slow fuel leak. That mistake reminded me to check the seal from every angle before tightening.

After reassembly, reconnect the fuel line and check for leaks before starting the engine. Keep the area ventilated and remove ignition sources. Start the engine without immediately adjusting every screw. Let it warm briefly, then observe idle speed, throttle response, exhaust smoke, and unusual sounds. A healthy response should feel smooth, not hesitant. If the engine stalls, hunts, or smells strongly of fuel, stop and inspect the float level, jet placement, and gasket seating. Do not guess for too long. Compare each adjustment with the manufacturer’s service specifications. Performance may improve, but perfection is not always immediate.